
Бесплатный фрагмент - Chess: A Self-Study Guide
Chapter 1 The chessboard, the chess lines, the chess square, the square location, the center of the chessboard
Chess is a game made for two people. It is played by alternatively moving chess pieces on a chessboard. So, the light-colored pieces and the squares of the board with the same color are referred to as white, while the dark ones are called black.
The aim of the game is to checkmate the opponent’s king. The player who checkmates his/her opponent is considered to be the winner. Apart from that, the game can end in a draw. The first move in a chess game is made by the player who plays with the white pieces.
These are a lot of new terms and concepts for you, dear reader, aren’t they? Don’t worry. Soon you will know everything you need to play the game! I suggest we start our exciting journey through the basics of chess!
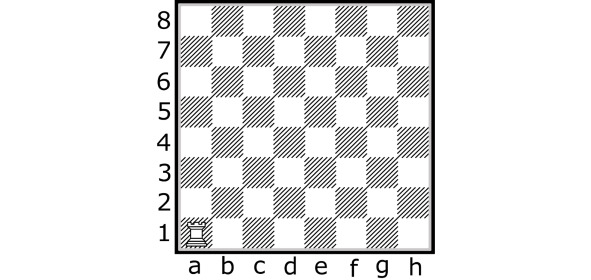
So, what is the chessboard? The chessboard is a squared playing field, which consists of 64 white and black quadrates. These quadrates are called chess squares. In order to set up a chessboard before the game, you must remember this rule: a white square should always be located on the right side of each player (Diagram 1).
All chess squares are separated by chess lines.
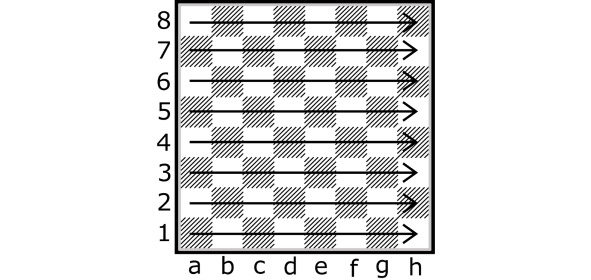
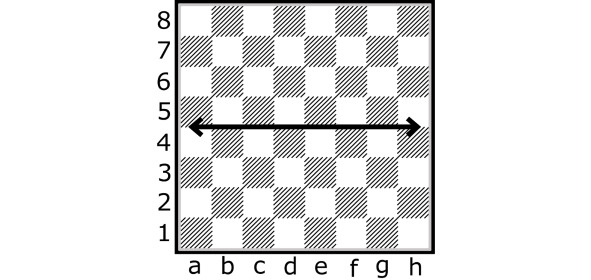
The lines crossing from left to right are called ranks (Diagram 2).
The ranks on the chessboard are denoted by numbers. There are eight ranks on the chessboard.
Exercises:
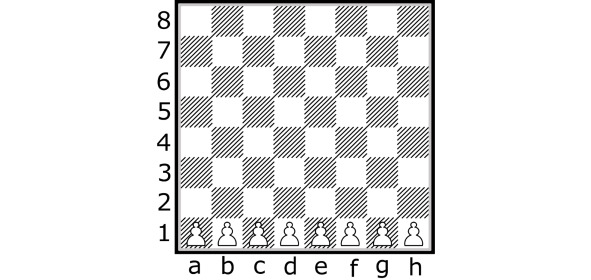
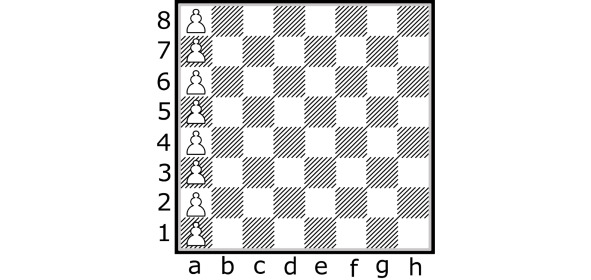
1. Set up white pawns on the first rank (Diagram 3).
2. In turn, set up the third, the fifth and the seventh ranks.
***
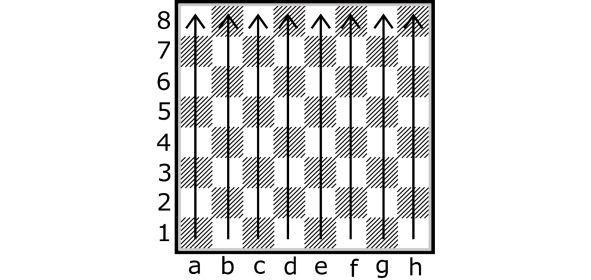
The lines crossing the chessboard from the bottom to the top are called files (Diagram 4).
The files are denoted by letters on the board: a, b, c, d, e, f, g, h. These are read as: [a], [bee], [cee], [dee], [e], [ef] [gee], [aitch]. There are eight files on the chessboard.
Exercises:
1. Place the white pawns on a file (Diagram 5).
2. Do the same for the files с, е, g.
***
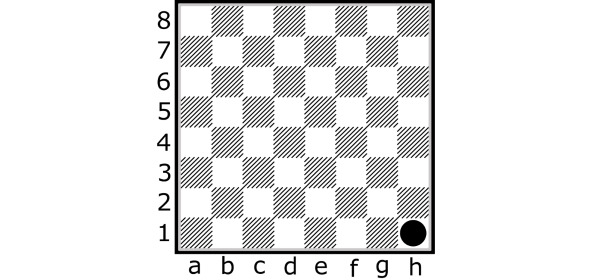
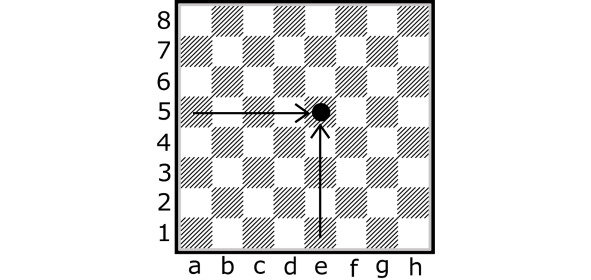
By knowing the symbol of each rank and file, we can determine the location of any square on the chessboard. For example, we can say that the square е5 is located on the intersection of the е-file and the fifth rank (Diagram 6).
Exercises:
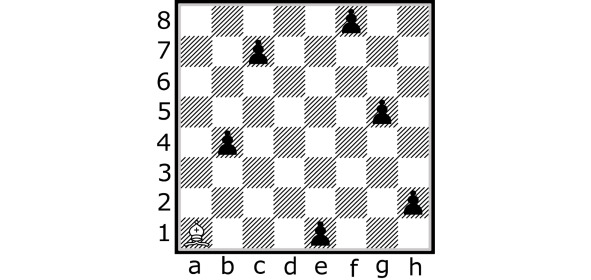
1. Place the white pawns on the following squares: b3, с5, d7, f8, g6, h4.
2. Determine the color of the following squares: b3, с5, d7, f8, g6, h4.
***
The lines of the same color which cross the chessboard diagonally are called diagonals (Diagram 7). There are white and black diagonals on the chessboard.
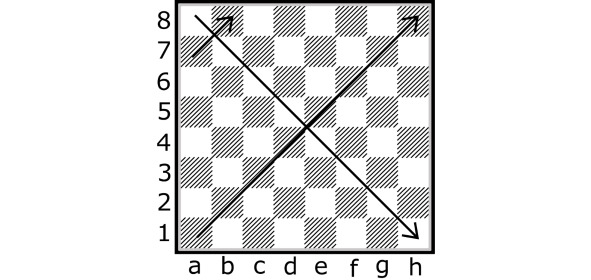
The diagonals on the board are designated by their two extreme squares; they are thus always called and written from left to right. For example, the diagonal а1-h8 is also called the large black diagonal and the diagonal а8-h1 is also called the great white diagonal. These diagonals consist of 8 squares, but there are also very small diagonals, which consist of two squares (eg. а7-b8). There are twenty-six diagonals on the chessboard.
Exercises:
1. Place the white pawns on the diagonal а7-g1 (Diagram 8).
2. Place the same pawns on the diagonal of five white squares called а4-е8.
3. Create any diagonal of five black squares.
***
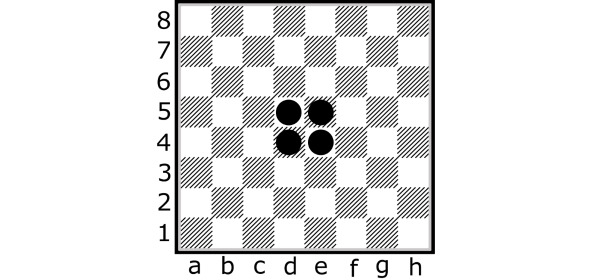
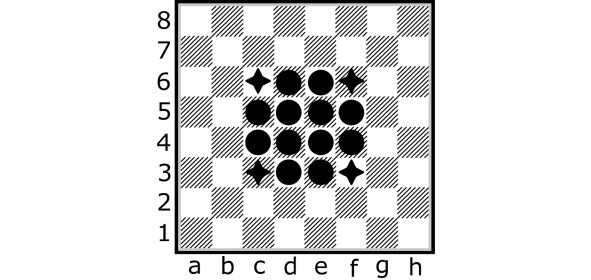
Each chess player has to know where the center of the chessboard is. The center of the chessboard has the shape of a square. There is the small center of the chessboard, which consists of four squares d4, d5, е4, е5 (Diagram 9) and the enlarged center, which consists of sixteen squares.
The corner squares of the enlarged center of the chessboard are the squares с3, с6, f3, f6 (Diagram 10).
Exercises:
1. Build the small center of the chessboard using white pawns.
2. Build the enlarged center of the chessboard using white and black pawns.
Chapter 2 The chess position, the starting position, the flanks, the demarcation line
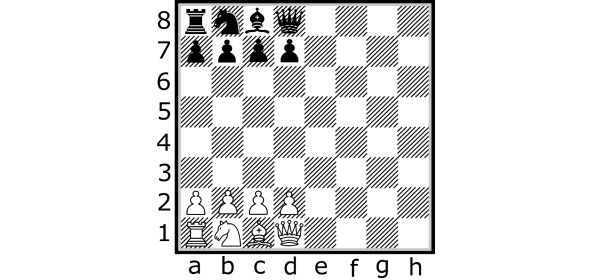
Any arrangement of pieces and pawns on the chessboard is called the chess position (Diagram 11).
Exercises:
1. Arrange the position as shown in the diagram.
***
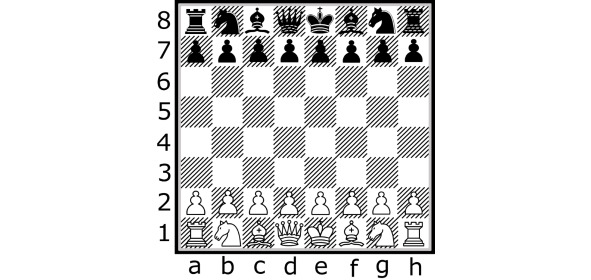
The location of chess pieces and pawns before the start of the game is called the starting position (Diagram 12).
Exercises:
1. Arrange the starting position as shown in the diagram.
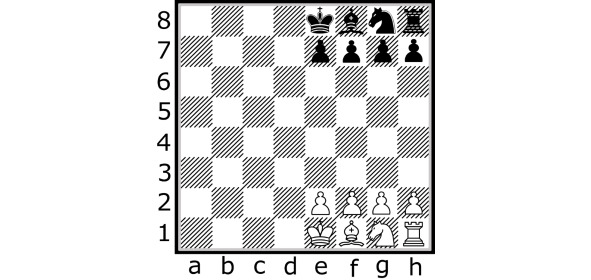
To arrange the correct starting position, you should start by placing your rooks on the corner squares, followed by the knights, the bishops and eventually the pawns (placed on the second rank for the white pieces and the seventh rank for blacks, respectively). In order to set up the Queen properly, we must remember that the color of the Queen and the square on which it stands is always the same: the Queen “loves” its color. There is only one empty square, next to the Queen, where the King is placed.
***
The one half of the chessboard which is occupied by the Kings in their starting positions is called the kingside (Diagram 13).
Exercises:
1. Identify the kingside as it is shown in the diagram.
***
The other half of the board, which is occupied by Queens, is called the queenside (Diagram 14).
Exercises:
1. Identify the queenside as it is shown in the diagram.
***
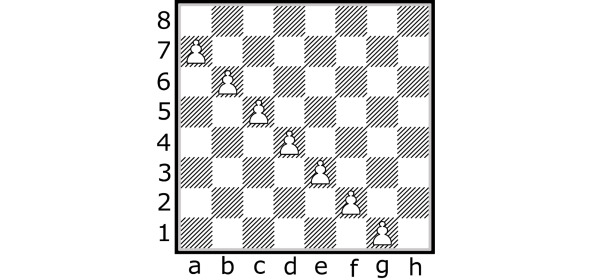
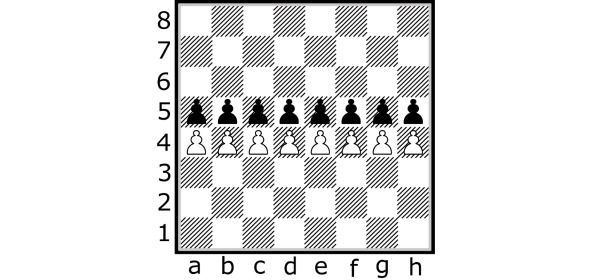
There is an invisible line between the fourth and the fifth ranks that bisects the board. This line is known as the demarcation line (Diagram 15).
Exercises:
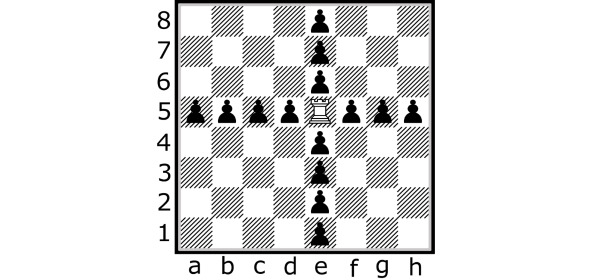
1. Place the pawns as shown in the diagram (Diagram 16). The demarcation line is located between the white and black pawns.
Chapter 3 Chess moves: the rook (capture), the exchange, the bishop (uneven exchange). Types of threats and their defense methods
In order to start our description of chess pieces, we will begin with the rook. It looks like this:

The rook is a piece that moves on the chessboard on ranks and files for an unlimited number of squares.
Exercises:
1. Place the white rook on the a1-square (Diagram 17), and practice by moving the rook on the chessboard. Move the rook in any direction and any numbers of squares, but only horizontally or vertically. After each move, take your hand off the piece.
***
The rook is a very strong long-range piece. For example, from the e5-square it attacks 14 squares and can, thereby, capture pieces of the opposing color when placed on these squares (Diagram 18).
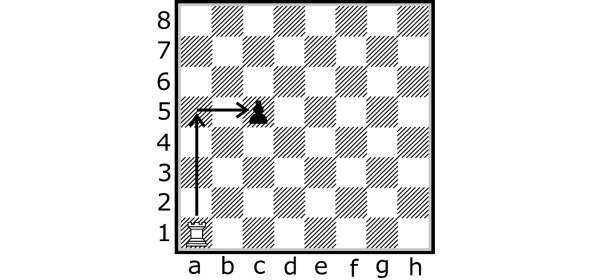
A capture occurs when you replace a square previously occupied by one of your opponent’s pieces with one of your own pieces. At the same time, the opponent’s piece is removed from the board. In order to capture an opponent’s piece, it is often necessary to first attack the piece or make a threat. For example, to take the black pawn on c5-square (Diagram 19), the white a1-rook should move on the a-file until the rook is in the same rank as the pawn (in this case the fifth rank). In the next step, the rook moves towards the pawn and takes its place (the pawn is removed from the board).
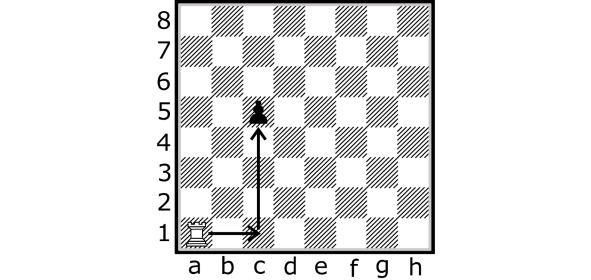
There is also another way: move the rook on the C-file and then move vertically towards the square where the pawn stands (Diagram 20).
Every piece in chess has its own value, measured in pawns. A rook is worth five pawns. The pieces which are more valuable than the rook are the King (it is the most precious piece because the game is impossible without it) and the Queen.
Exercises:
1. Put the white rook on the a1-square, then place the black pawns on the following squares: b3, c5, d7, f8, g6 and h4 (Diagram 21). Capture all pawns, taking your hand off the piece after each move. It is very useful, when doing this exercise, to count one, two, three and so on. Saying out loud the names of the squares which the rook moves onto complicates this exercise; however, it will help you a lot in the future.
2. Place the white rook on the a1-square and put the black pawns in the following squares: b3, c5, d7, f8, g6 and h4. Then put a black rook on the h1-square and the white pawns on the following squares: g3, f5, e7, c8, b6 and a4 (Diagram 22). The white rook starts the game (consider the pawns as immotile objects for threats). White and black rooks can be moved in alteration. The aim is to capture all the pawns of the opposite color (consider that the opponent’s rook cannot be captured), while the rook must make a threat or take a pawn with each one of its moves. It is helpful to count during this exercise: white, black, white, black etc.
3. It is advised to do this exercise with a partner. Arrange the position as it is shown in the diagram (Diagram 23) and play a training game. White starts the game. The player who has one rook left loses. Note: if a piece is exchanged for another piece of the same value, this mutual capture is called an exchange.
When playing chess, you must remember the basic rule, called the “Touch-move rule”. According to this rule, each player is taught to be responsible for their moves. If a player touches a piece without warning of their attention to adjust its position correctly, they are forced to move it.
***
The next piece we’ll talk about is called the bishop.
The bishop looks like this:

The bishop is a piece that moves on the board diagonally across any number of squares. The bishops (white and black) which move along the white diagonals are called white-squared, and the bishops (white and black) moving on the black diagonals, are called black-squared.
Exercises:
1. Place the white bishop on the a1-square and practice by moving the bishop across the chessboard: the bishop moves in any direction, and onto any number of squares, but only diagonally. After each move, remember to take your hand off the piece.
The bishop is a long-range piece. For example, it attacks 13 squares from the e5-square and can, thereby, capture the opposite pieces when placed on these squares (Diagram 24). The bishop is worth three pawns. The bishop is less valuable than the rook, as it is less “powerful’”. It is able to take an opponent’s piece only when the latter is placed on a certain color. The rook can make a threat to an opposite piece on any square of the chessboard. If a player captures the opponent’s rook in exchange for their bishop, it is said that they have won the exchange.
Exercises:
1. Place the white bishop on the a1-square, and then arrange the black pawns on the following squares: b4, c7, f8, g5, h2 and e1 (Diagram 25). Capture all pawns, remembering to take your hand away from the bishop after each move. As in the case of the rook, this exercise can be done easily by counting one, two, three and so on. This exercise will be more difficult and useful if you pronounce the name of the square out loud to which the bishop is going to move.
2. Place the white bishop on the a1-square and put black pawns on the following squares: b4, c7, f8, g5, h2 and e1. Then put the black bishop on the h1-square and white pawns on the squares: g4, f7, c8, the b5, a2 and d1 (Diagram 26). You have to take the pawns by the bishop, as you have done previously with the rooks. Note: In this exercise, the bishop often takes pawns without creating additional threats unlike the rook (the rook might either threaten or capture a pawn, while a bishop usually captures pawns with each move).

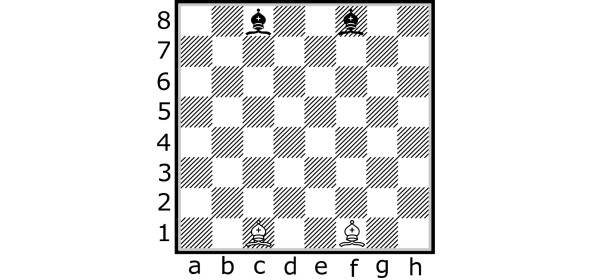
3. Arrange the position as shown in the diagram (Diagram 27) and play a training game. The player who has one bishop left loses.
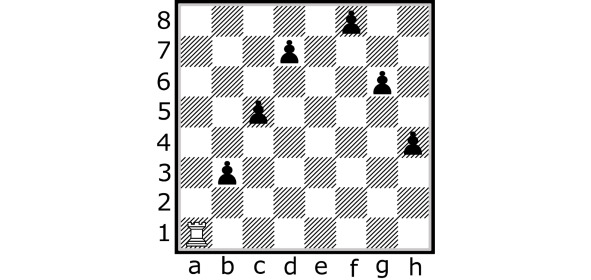
4. Place the white rook on the a1-square and put black pawns on the squares: b3, c5, d7, f8, g6 and h4. Then put the black bishop on the h1-square and the white pawns on the following squares: g4, f7, c8, b5, a2 and d1 (Diagram 28). As always, the white pieces start first. When doing this exercise (you need to capture all the pawns), it is important to move the rook and the bishop strictly onto the squares on which they are allowed to be placed. It is better to count out: white, black, white, black and so on.
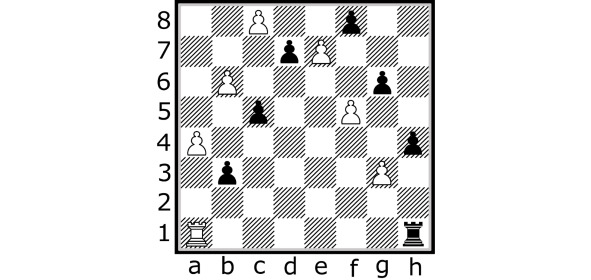
5. Arrange the position as it is shown in the diagram (Diagram 29), and play a training game. The player who is left with one piece loses. Try to attack the rooks with the bishops and attack the bishops with the rooks.

If you play the position as it is proposed in Diagram 29, you will face the necessity to defend yourself against your opponent’s threats. This is a very important element in chess, so I propose to study it in detail. In order to explain this, I’ll use chess notation, i.e. the writing of chess moves using letters and numbers. The rook is usually denoted by the letter R and the bishop is marked with the letter B. The capture is indicated by the symbol x.
Бесплатный фрагмент закончился.
Купите книгу, чтобы продолжить чтение.